Celestron – Teleskop NexStar 5SE – Počítačový ďalekohľad pre začiatočníkov a pokročilých používateľov – Plne automatizovaný držiak GoTo – Technológia SkyAlign – 40 000+ nebeských objektov – 5-palcové primárne zrkadlo, oranžová

Brand:Celestron

3.3/5

1804.51

BONUS BEZPLATNÝ SOFTVÉR STARRY NIGHT: Váš Celestron NexStar 5SE obsahuje bezplatné stiahnutie špeciálnej edície Starry Night, jedného z najlepšie hodnotených astronomických softvérových programov. Simulujte nočnú oblohu, spoznajte nebeské objekty a naplánujte si pozorovanie. BEZKONKURENČNÁ ZÁRUKA A PODPORA: Nakupujte s dôverou od Celestron, poprednej značky teleskopov v Kalifornii od roku 1960. Nákupom od autorizovaného predajcu na Amazone získate 2-ročnú záruku v USA a neobmedzenú podporu od nášho tímu odborníkov so sídlom v USA. JEDNODUCHÉ NASTAVENIE A POUŽÍVANIE: Zostavenie teleskopu trvá len niekoľko minút. Po nastavení vám vstavaná technológia SkyAlign pomôže rýchlo vyrovnať teleskop. Keď skončíte s pozorovaním, teleskop sa rozloží na malé súčasti, aby sa dal ľahko skladovať. PLNE AUTOMATIZOVANÝ GOTO MONTÁŽ: S databázou viac ako 40 000 nebeských objektov držiak GoTo NexStar SE lokalizuje a sleduje objekty za vás. Je to ideálny ďalekohľad pre začiatočníkov v astronómii. NexStar SE je kompatibilný aj so StarSense a SkyPortal WiFi. 5-PALCOVÝ TELESKOP SCHMIDT-CASSEGRAIN: 5-palcové primárne zrkadlo v sebe skrýva dostatočnú schopnosť zhromažďovať svetlo, aby poskytovalo pôsobivé pohľady na Mesiac a planéty spolu s objektmi hlbokého vesmíru, ako je hmlovina Orion, pri zachovaní kompaktného tvaru. POČÍTAČOVÝ TELESKOP NEXSTAR 5SE: Ikonický oranžový tubusový ďalekohľad Celestron kombinuje 5-palcovú Schmidt-Cassegriovu optiku s aktualizovanou technológiou a najnovšími funkciami pre úžasný zážitok z pozorovania hviezd pre začiatočníkov aj skúsených pozorovateľov.

Nie sú k dispozícii žiadne jednotky
BONUS BEZPLATNÝ SOFTVÉR STARRY NIGHT: Váš Celestron NexStar 5SE obsahuje bezplatné stiahnutie špeciálnej edície Starry Night, jedného z najlepšie hodnotených astronomických softvérových programov. Simulujte nočnú oblohu, spoznajte nebeské objekty a naplánujte si pozorovanie. BEZKONKURENČNÁ ZÁRUKA A PODPORA: Nakupujte s dôverou od Celestron, poprednej značky teleskopov v Kalifornii od roku 1960. Nákupom od autorizovaného predajcu na Amazone získate 2-ročnú záruku v USA a neobmedzenú podporu od nášho tímu odborníkov so sídlom v USA. JEDNODUCHÉ NASTAVENIE A POUŽÍVANIE: Zostavenie teleskopu trvá len niekoľko minút. Po nastavení vám vstavaná technológia SkyAlign pomôže rýchlo vyrovnať teleskop. Keď skončíte s pozorovaním, teleskop sa rozloží na malé súčasti, aby sa dal ľahko skladovať. PLNE AUTOMATIZOVANÝ GOTO MONTÁŽ: S databázou viac ako 40 000 nebeských objektov držiak GoTo NexStar SE lokalizuje a sleduje objekty za vás. Je to ideálny ďalekohľad pre začiatočníkov v astronómii. NexStar SE je kompatibilný aj so StarSense a SkyPortal WiFi. 5-PALCOVÝ TELESKOP SCHMIDT-CASSEGRAIN: 5-palcové primárne zrkadlo v sebe skrýva dostatočnú schopnosť zhromažďovať svetlo, aby poskytovalo pôsobivé pohľady na Mesiac a planéty spolu s objektmi hlbokého vesmíru, ako je hmlovina Orion, pri zachovaní kompaktného tvaru. POČÍTAČOVÝ TELESKOP NEXSTAR 5SE: Ikonický oranžový tubusový ďalekohľad Celestron kombinuje 5-palcovú Schmidt-Cassegriovu optiku s aktualizovanou technológiou a najnovšími funkciami pre úžasný zážitok z pozorovania hviezd pre začiatočníkov aj skúsených pozorovateľov.
Batteries 8 Lithium Metal batteries required.
Brand Celestron
Customer Reviews 4.3 4.3 out of 5 stars 1,093 ratings 4.3 out of 5 stars
Eye Piece Lens Description Plossl
Finderscope Reflex
Focus Type Manual Focus
Is Discontinued By Manufacturer No
Item model number 11036
Item Weight 17.6 Pounds
Manufacturer Celestron
Model Name 11036
Objective Lens Diameter 125 Millimeters
Power Source Battery Powered
Product Dimensions 12.6 x 10.63 x 5.11 inches
Product Dimensions 32.01"D x 27.01"W x 12.99"H
Telescope Mount Description Altazimuth Mount

3.3

8 Review
5 Star
70
4 Star
12
3 Star
5
2 Star
5
1 Star
8

Napíšte svoju recenziu

Váš email nebude zverejnený. Všetky povinné polia sú označené*

Scritto da: JBoss
For the Entry Level Observers 4SE
To provide context, I live in Houston city limits and purchased this for my mom last Christmas. It's quite heavy, so I carry it out each time. She wouldn't be able to lift it in one piece. We keep it in a corner of the house so as to not break it down and set it up each time. We, for the most part, use it to take a peak at Venus and the moon. You can get some fantastic views of the moon as it goes through its phases. A few weeks back we woke up at around 4 am to see Jupiter and her four moons with it. That was cool! In the city, the telescope, with its stock eyepiece, is mainly useful for viewing the moon in good detail. You can also peer into the sky to view stars you hadn't noticed with the naked eye. You'll be able to observe shimmering stars both faint and bright. The wane and wax of bright Venus can also be observed over time, similar to the way the moon comes and goes, but at first it'll look like a very bright star until you pay attention to its change over time. There isn't much detail in the observation of Venus, but the shadows and craters of our moon are fascinating. There will be plenty of oohs and ahhs from family and friends as they peer through the eyepiece. You'll need to align the telescope each time you use it. If you don't know any stars in the sky, that's fine; you can use the moon as an alignment point. You'll power on the scope and hit Enter. You can scroll through alignment options. I prefer to use Solar System Align in the options. You put in your time, date and location. You then choose what in the solar system you want to align to. If you recognize Venus, align the scope to Venus with the remote. If you recognize the moon, align to the center of the moon. Follow the prompts on the remote to align. Once you're aligned, the scope will know to follow the object in the sky without you having to do so manually -- objects in the sky aren't static! Before you do all that, make sure you align the red dot pointer on top with what you see in the eyepiece. The calibrated red dot will be your friend as it provides a wider view. You can do this in the daytime with a point somewhere down the road or even in the sky at night. Turn it off when not in use, as it runs on a separate battery. You only have to align the red dot pointer once. Adjust in the future as needed. There is a software package that comes with the scope. It's really just to help you learn about the sky. It's a nice tool to have when you look up and ask, "I wonder what that star is!?" You can open up the Starry Night software and pinpoint it. You'll learn its etymology and plenty of fun facts. You'll become a more educated observer. And they have good customer service if you run into issues obtaining the software. It's worth the download. You'll need to purchase one more item: a powerbank. It's not an endorsement, but I purchased TalentCell's Rechargeable 12V Lithium ion battery. It's Chinese-made. I charged it once and have used it for months. There are other brands. If you want to take images with your DSLR, you can do that. You'll need to hook that up to the camera jack that's available on the telescope. There's a camera icon on the side. You won't miss it. I haven't hooked up a camera, but it's on my to-do list. I don't have the appropriate cord. The images I am uploading were shot through the eyepiece on an iPhone. Some are hard to capture as slight movement takes it out of focus. You will be better served viewing through the eyepiece yourself. Lastly, once you become familiar with this telescope and all its offerings, you'll want to upgrade the eyepiece to increase magnification. You'll be able to see our solar system's planets in greater detail and color. Spend some time exploring the scope's functions and the night sky then do some research on the appropriate eyepiece upgrade. Images: This is approximately what you'll see through the eyepiece. Image 1-- first night using the scope to view the moon (no editing) Image 2 -- first week using the scope to vie the moon (no editing) Image 3 -- first full moon (no editing) Image 4 -- first image of Venus and surrounding stars (no editing) Image 5 -- Venus and surrounding stars (slight color adjustment) It's worth the buy. If it had come with another quality eyepiece and power bank at this price point, I'd have given it five stars.
Scritto da: Darcy Pennell
Expect to spend more money
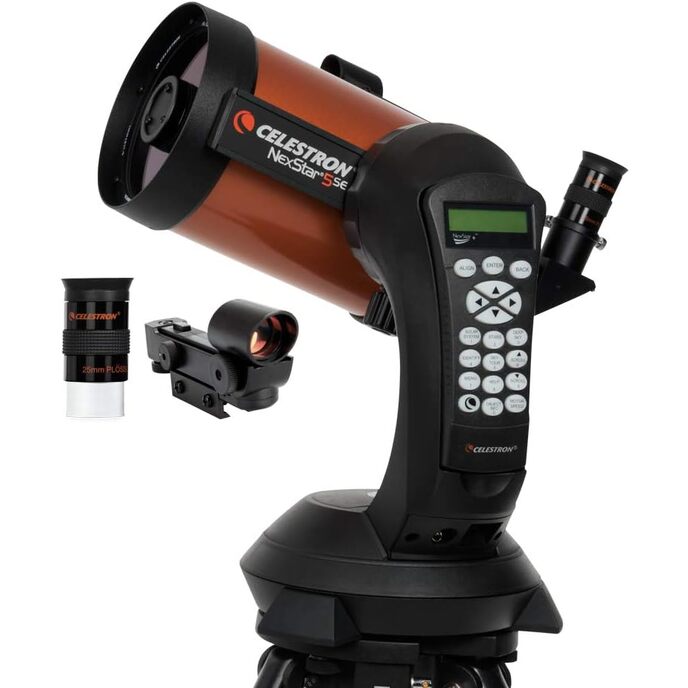
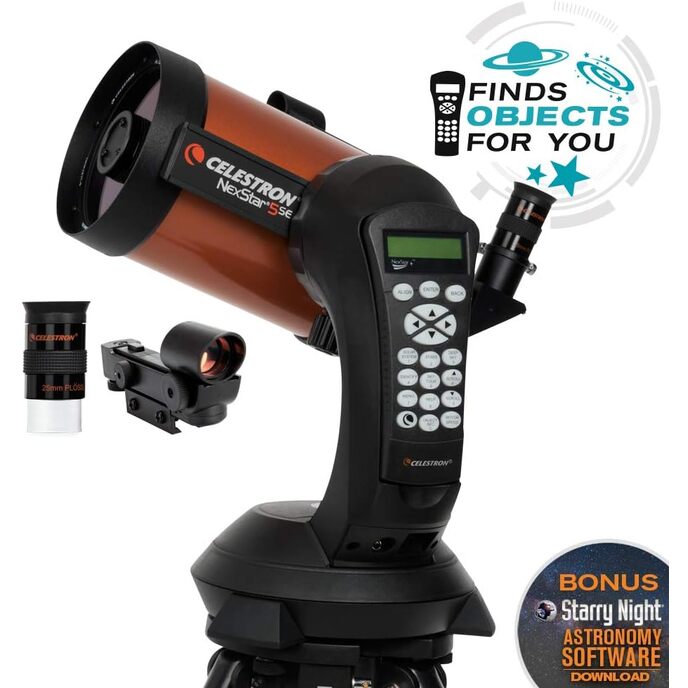
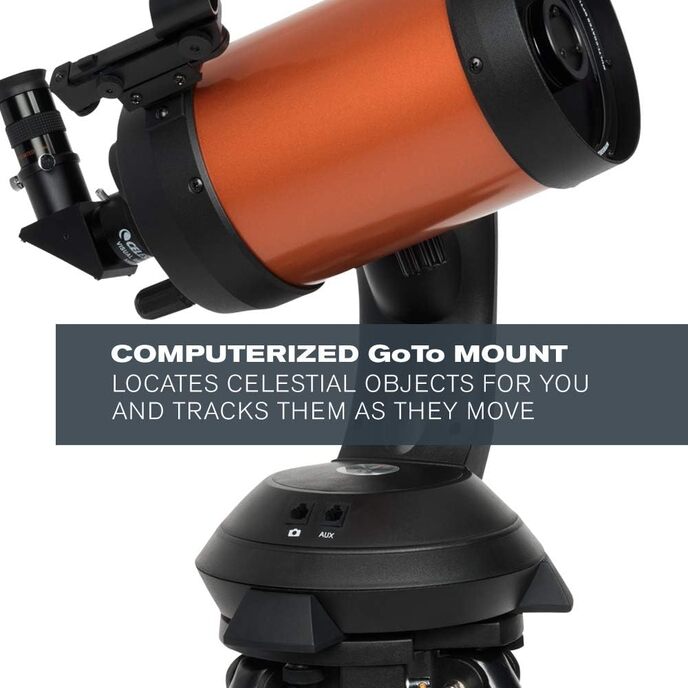
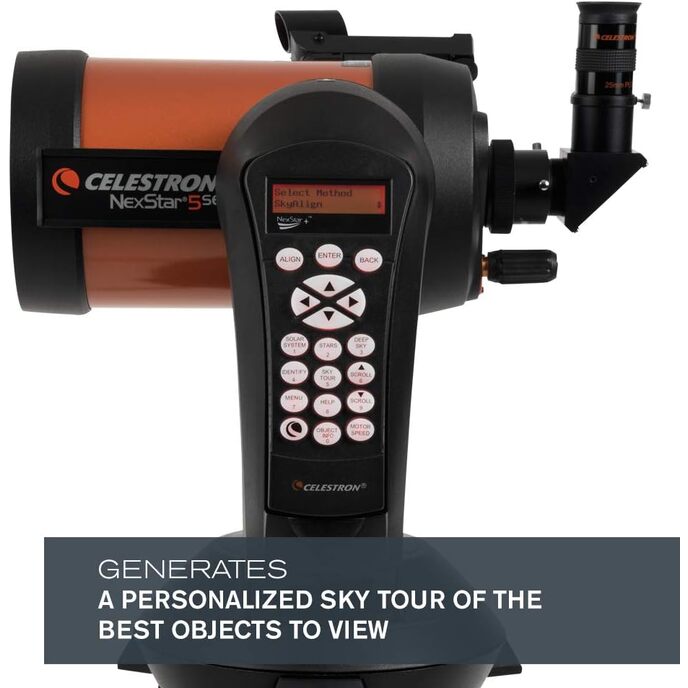
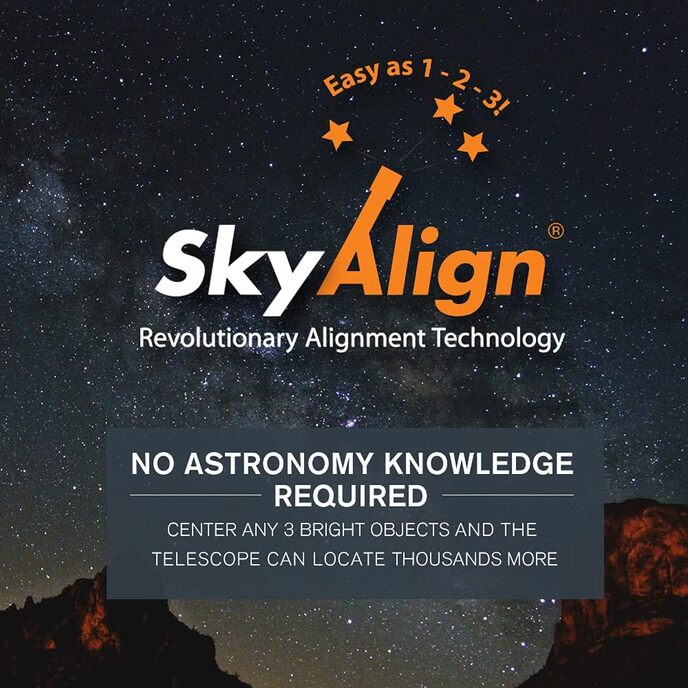
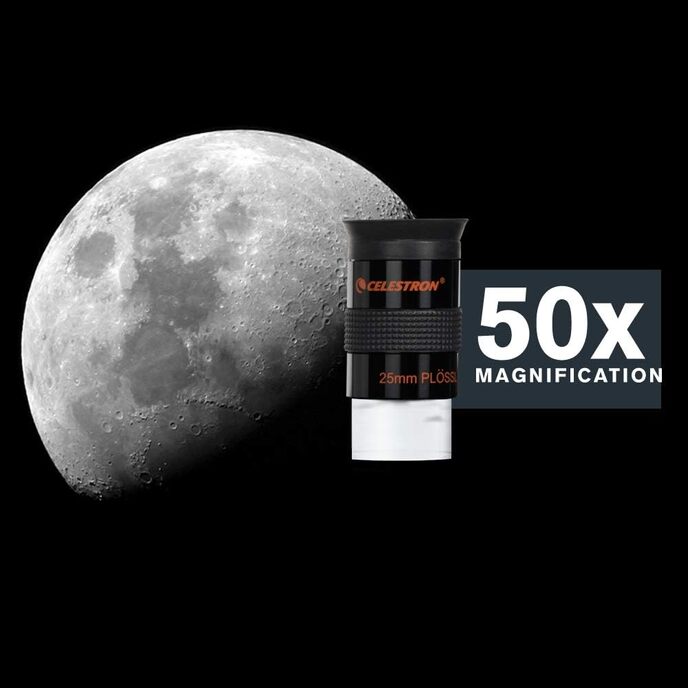
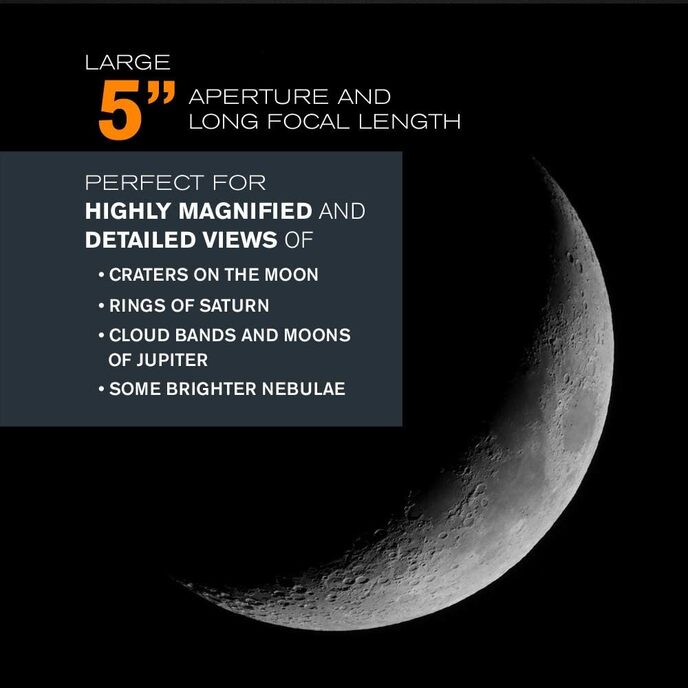
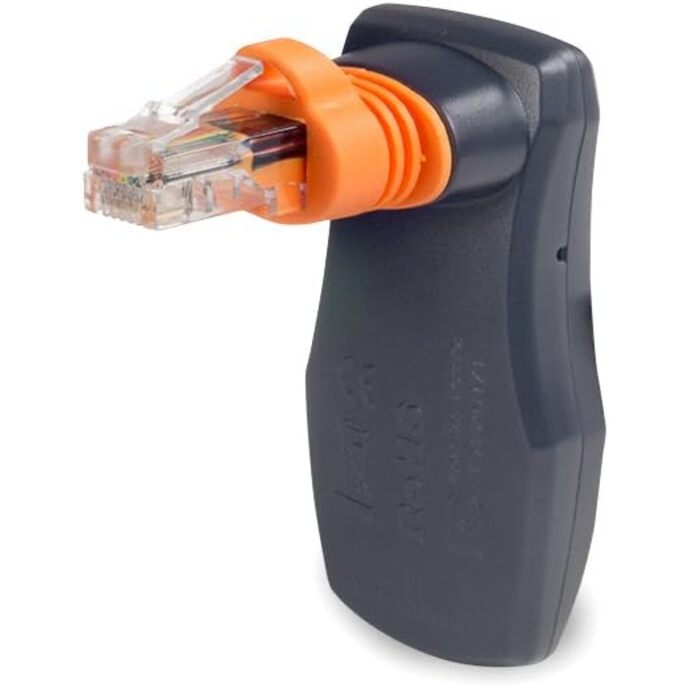
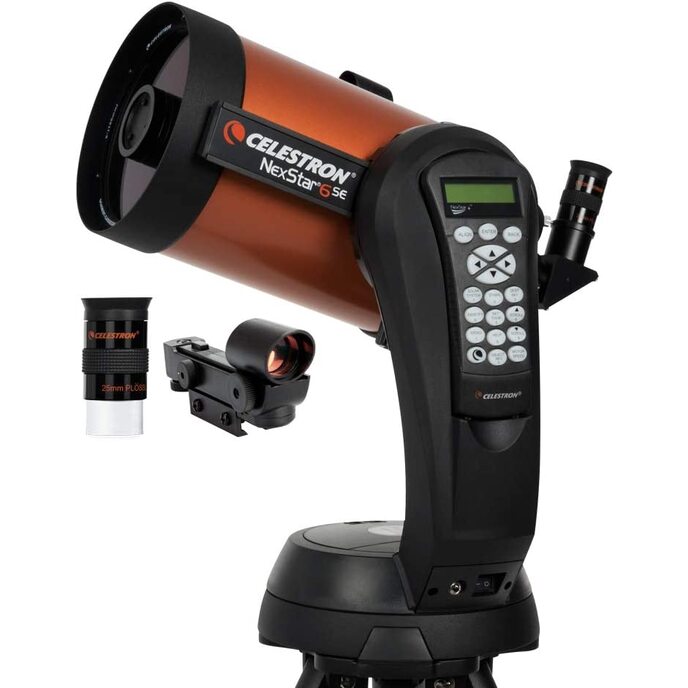
First, let me say that this telescope is great. It has a lot of really cool features. Once it is aligned (more on that later) you can zip to any spot in the sky to look at a lot of cool stuff. As far as I can tell, as a novice, the optics are great. All that being said, I want to give a little warning: expect to spend more money, a lot more money. I haven't marked it down for this, but I want to make it clear for anyone considering it. An experienced user may think this is silly to mention, but, as a total novice, I had no idea what I was getting myself in to. I got this for my dad. He always wanted a telescope. When I saw that I could get this fairly nice one for only $450, I thought it looked like a great deal. I ordered it and it arrived very quickly. When I went to set it up, it was like I hit a wall. When you first start the telescope, it needs to be aligned. There are several available methods for aligning it. The most accurate, I believe, is the three-star align. It seemed easy enough... You find a star and center in the finderscope using a little red LED pointer. Once it is centered in the finderscope, then you center it in the eyepiece and move on to the next star. Easy, right? Here is the first problem: the included finderscope is junk. You have to crouch down to use it and the position of the star changes depending on your angle. I would think the star was centered, then I would move to the telescope eyepiece and all the stars just looked alike. I tried aligning the finderscope using instructions I found on the internet, but it was no good. There was only really one viable solution, a better finderscope. after looking at reviews, I ordered theOrion 9x50 Illuminated Right-Angle CI Finder Scope ($130). After the new finderscope arrived, it quickly became clear that I needed a special bracket so that it would fit the telescope. So, of course, more money spent ($15). The new finderscope made it easier to find the stars and was a lot easier to align, but it didn't eliminate all of the alignment problems. The next issue was getting the star (or planet) aligned in the eyepiece. The only eyepiece included with this scope is the 25mm E-Lux plossl eyepiece. For me, at least, it was impossible to get the object right in the center. My alignments would either fail or when they didn't fail, the alignment would be a bit off. I figured it had to do with not being able to center it properly. To solve this issue, I ordered theCelestron Crossaim Reticle Eyepiece ($68). This is a 20mm eyepiece, I believe, with illuminated crosshairs to make it easier to get it in the center. The new finderscope and eyepiece helped a lot, but my alignments were still failing, a lot. Like probably 75% of the time. The other issue with alignment is the need for accurate time and location information. The handset didn't have any cities particularly close to me. To solve this problem, I ordered theCelestron SkySync GPS ($170). The SkySync definitely made setting the time and location a lot easier, though I am not sure it was worth the money. So, now I am able to get it to align a little easier, though it still fails a lot, which gets frustrating, but at least it is aligning. Getting it to align was only one issue. The other issue is that you don't really see much with the included 25 mm eyepiece. You can get a nice view of the moon, but that's about it. To really explore the sky, more eyepieces are needed. Yay, more money to spend! I ordered theCelestron Accessory Kit ($125). This is actually a pretty good deal. it includes five eyepieces, a 2x barlow magnifier thing and several filters for looking at different planets. I've been able to get some really cool views of Saturn and Jupiter, so far. Everything is almost done. I can align it. I can look at some planets. It's working pretty good. Just one more problem. As I mentioned, I bought this for my dad. He's 75 and can't stand for long periods, which means he can't actually look through the eyepieces. So, another purchase had to be made in order to get the image from the telescope onto the computer for him. I bought aCelestron NexImage 5 MP 5 Solar System Imager with Micron Digital Clarity Technology, Black (93711) ($200). The camera works relatively well to get the image on the screen. It's not great, definitely not as good as looking with the naked eye, but my dad is happy with it, when I can actually get something aligned and in focus. So far, we have gotten some great pictures of the moon and Saturn. So, the telescope was $450. All the stuff I had to buy to actually make it usable was over $700. So, my $450 bargain turned into an $1100 headache. It all works now, but I don't think I would have bought it in the first place if I had realized how much more money I would end up spending.
Scritto da: C B
5se - Great beginner scope
Got this for my birthday, took it out and was able to get it set up and working with some beautiful shots of the moon and stars. At first I was worried as a lot of the professional reviews for the 5se weren't great. Then I remembered I'm not a professional. For a beginning hobbiest I am overjoyed with the quality ease of use and features this telescope offers for a beginner. Also it's worth noting that I this is small and portable enough I can take it with me to friend's houses or to a starviewing get together. I really like this one, sure I may upgrade in the future but not nearly as soon as the professionals would suggest.
Scritto da: Slim
Love it!
Love the new telescope, my son calibrated the telescope and he said it didn't take long. I've also ordered Celestron NexYZ Phone Scope Adapter, Celestron 93640 1.25 Inch Universal Barlow and T-Adaptor and a moon filter.
Scritto da: Amazon Customer
Not worth the money
This product came badly packed, it looked as if it had been opened. Some parts that the instruction say should be there are missing. The mirror tilt the rubber just turns round and round either way you try to look. no disc with the first one.Amazon have replaced it. it says in the documentation that it should have a 232 cable and 2 cd disks. we got one disk this time and no 232 cable as it says in the instruction manual. yes I know 232 is old hat an not used now, however the manual should be changed to say so.
Scritto da: stuart b.
Nexstar 4se , good enough ... maybe
Ok , so I wanted a fairly portable goto mount .. the nexstar fits the bill . It also has a wedge which can be used to put the mount into equatorial mode ( not tried this yet ) All in all iss good , maybe a bit frustrating that you cannot use the mount without powering it up . Skywatcher have two small az mounts that can both be moved without powering up. Celestron take note ! The scope is lovely . What I mean by that is it looks great and works great ( as long as you realise it’s limitations ) it’s great when viewing the moon and the brighter planets ... but for dso’s , well, forget it . That’s why people have more than one scope ... no one scope does everything well ! The good thing about the 4”Mak is that due to the long focal length you don’t need to push the magnification. All in all a fine combination of scope and mount , with a few caveats .
Scritto da: janet jessop
Nice upgrade from previous scope
Bought this for my husband, he's really pleased with it, we didn't have too many problems assembling it once we got the holes and screws lined up. It is quite heavy once on the stand so I wouldn't say it was easily portable as the stand is made if steel. My husband says it would be more for intermediates than beginners. He likes the images as they are clear. Not used it yet with PC or camera but can't foresee any problems.
Scritto da: Mal
Early use encouraging.
I needed a telescope I could transport and this fits the bill. Takes roughly ten minutes from case to being operational. I am sure once I get more practice that will improve. Due to weather not been able to fully set up electronic but did manage to look at moon and get a photo. Very encouraging for the future. Following other feedback not bothered with batteries got power pack and mains adaptor. Only slight problem area is lining up head with bolts on tripod. Would be good if marked in some way or more detailed info in instructions. Could of course just be me.

Súvisiace produkty

Objavte našu medzinárodnú sieť

Dodávame do 28 krajín, viac ako 200 000 produktov. Zostaňte informovaní, prihláste sa na odber noviniek.

Array